
1. Enter your workspace and add people
Arrange your workspace and initial administrator through AuditBull or your named partner. Submit an organization access request to start the review.
Confirm the workspace name after signing in. The selector lists workspaces you belong to. If yours is missing, contact your administrator or support.
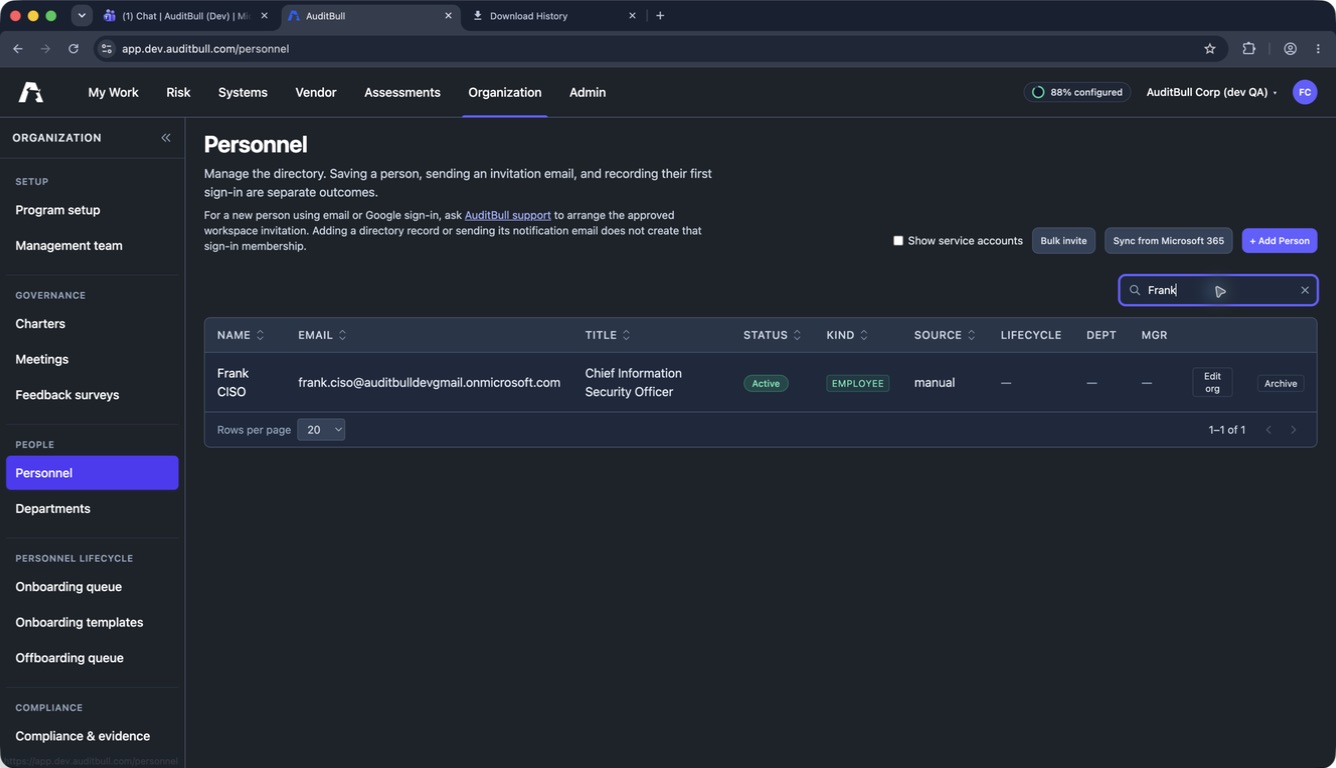
Add people under Organization → Personnel. Check the person’s saved details and invitation result, then follow the activation instructions. For email or Google sign-in, ask AuditBull support to arrange the approved workspace invitation.
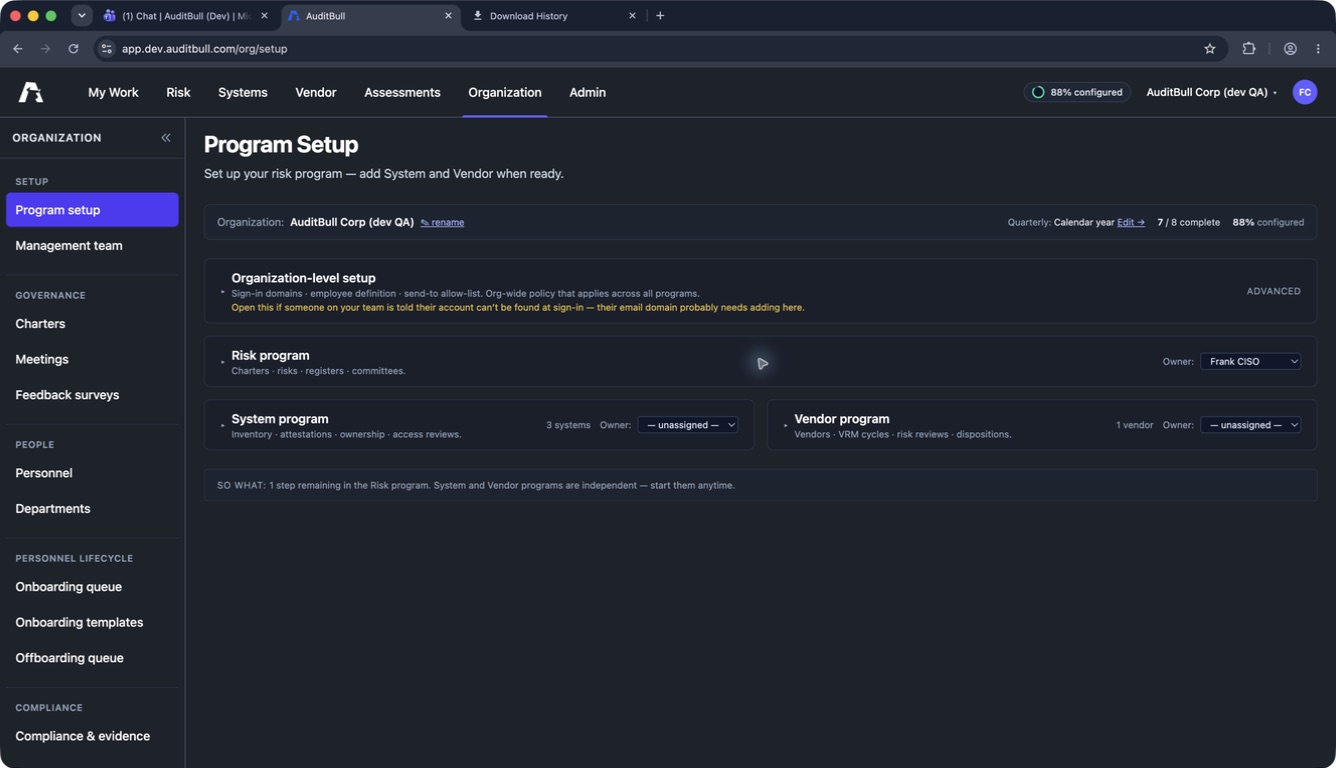
In Organization → Program setup, expand Organization-level setup and review Allowed sign-in domains for Microsoft sign-in routing. Administrators assign workspace membership and roles separately.
If your workspace needs a Microsoft connection, use Admin → Settings → Microsoft Teams → Connect Microsoft Teams with the intended organization’s work account. A conflicting connection needs support review. Your Teams administrator makes the approved app available under your organization’s policy.
Connecting Teams links your Microsoft organization to this workspace. Directory synchronization and delegated scheduling are outside the current launch setup. AuditBull will communicate availability if those features are needed.
2. Configure the program and reporting calendar
Open Organization → Program setup and use Edit → beside Quarterly for the calendar. Administrators and designated cadence editors can change review frequencies under Admin → Cadence policy.
For an established program, enter a reason and inspect the preview’s UTC dates before Schedule change. The current quarter finishes first; the preview identifies any shortened transition period.
- Carry valid earlier evidence retains the evidence’s original dates and existing deadlines.
- Require fresh reviews calls for a new transition review; an earlier existing deadline still applies.
You can replace or cancel a pending change. For repeated quarter labels, choose the exact dated window. Existing work and reports are retained.
3. Record reviews and inspect evidence
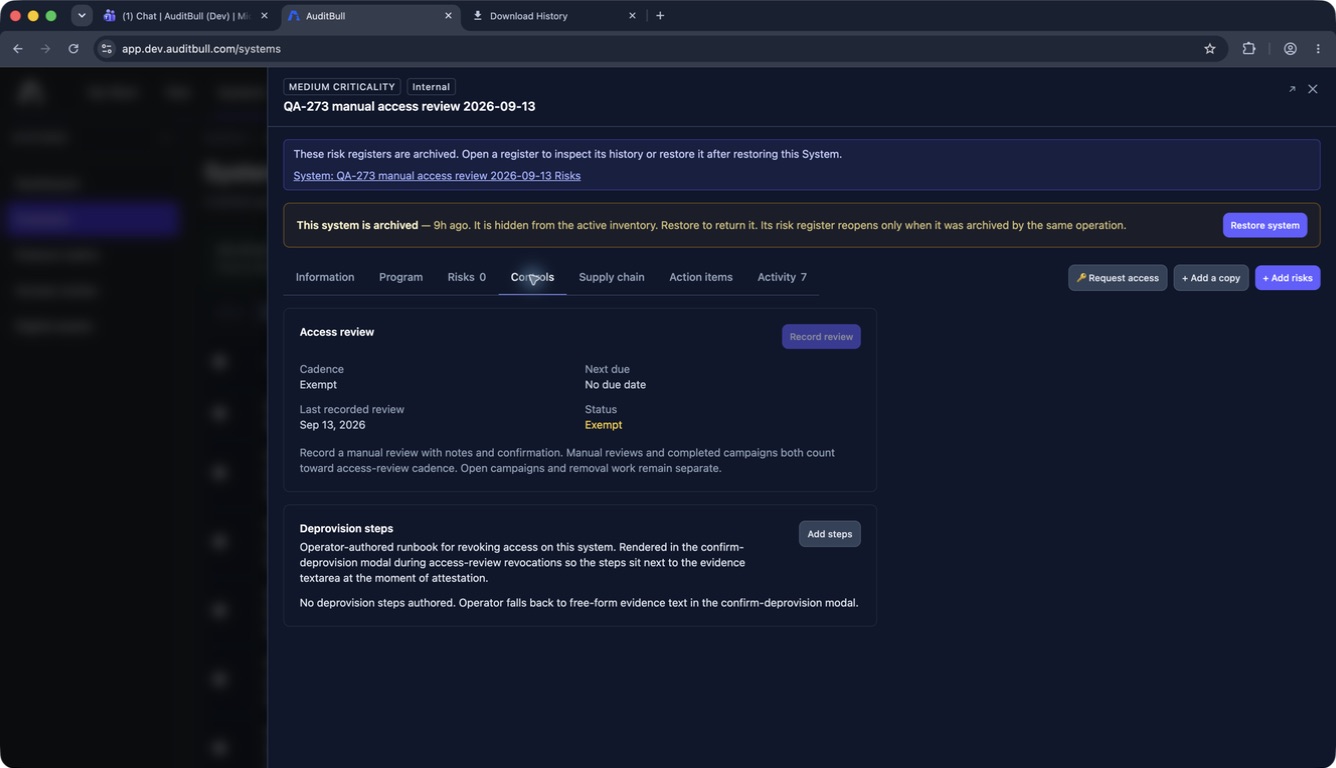
Open a System from Systems → Inventory and find Access review under Controls. If it is Not enrolled, a person with System edit access can open Edit System settings, select Include this System in access reviews and save. Restore an archived System before changing its enrollment.
Use Record review when available. Check the System’s review schedule and due date, enter supporting notes and confirm your review. Manual reviews and completed campaigns both count toward scheduled and quarterly completion.
Check the saved reviewer, notes and completion time in the System’s review details or Activity. Record campaign responses and changes to external access separately.
Unenrolling stops new scheduled reviews and clears the current due date. Review history is retained, and open campaigns stay open.
If report history is unavailable, contact support before relying on its totals. After a period ends, active administrators can Make a correction with a reason and evidence for the affected record and period. Original values and correction history remain.
4. People and access removal
The Personnel directory, ownership reassignment and administrator-controlled access removal remain available. Before archiving a person, review and resolve their active responsibilities. Check external account removal separately.
Employee onboarding and departure campaigns, templates, task queues and reminders are reserved for a future update. Existing records and audit history are retained. System access-review remediation remains available under the relevant System.
5. Review a returning person
A returning person signs in with their retained account and chooses Request return review on the removed-access screen. In the Personnel request queue, choose Review returning person. Confirm the person’s identity, resolve the listed ownership or offboarding blockers, select their current role and record your reason before Restore this person.
The same Personnel record and history return. Previous access permissions and Microsoft feature consents are retired. Completed offboarding tasks stay completed. Review and grant the person’s current responsibilities explicitly.
Contact support if an unfinished departure blocks restoration while Personnel lifecycle is deferred, the sign-in account changed, the request cannot be matched, or an email address now belongs to a different person.
6. Archive Systems and registers
From Systems → Inventory, open the System and review the impact before Archive system. The registers owned directly by that System and their unarchived risks retire. Listed risks in other registers remain unchanged; review whether to close them.
Archiving a register directly preserves its risk states. Archived registers are read-only, stop new review obligations and are excluded from reporting from their archive period. Earlier evidence remains available.
Inspect history through Risk → Risk Registers → Table → Archived. Restore register follows the displayed prerequisites; a System-owned register needs an active owning System. If a register stays archived after its System is restored, follow the System’s recovery link to restore that existing register. Retired risks remain archived; restore them explicitly when appropriate.
7. Recover an interrupted change
If a response is interrupted, check the saved result before submitting again. Use the displayed recovery controls.
- For a manual access review, use Refresh receipt and, when offered, Confirm previous request. Read the warning before starting a separate review.
- For a corrective action plan, keep your details and refresh that risk’s plans before trying again. A submitted request may finish after the dialog closes.
- For a return approval, refresh the review to read its recorded outcome.
If nobody can sign in as an administrator, contact support. Support confirms your identity through a known customer contact before arranging an approved sign-in replacement.
8. Manage licensing and billing
Arrange purchases with AuditBull or your named partner. Your workspace administrator manages activation in the web app.
Use Admin → Settings → License & trials to check your plan, expiry and enabled modules, or apply an issued key through the available administrator action.
Choose Manage subscription & billing → for Billing & plan. Use the available online actions or follow the contact guidance. Manage plans activated by a license key through the license controls.
After checkout, use Refresh current plan to confirm the result. If the outcome remains unclear, contact support before starting another billing action.
Need a hand?
Contact your workspace administrator, named partner or AuditBull support. Include the workspace name, affected record, action attempted and message received.
Visit support →